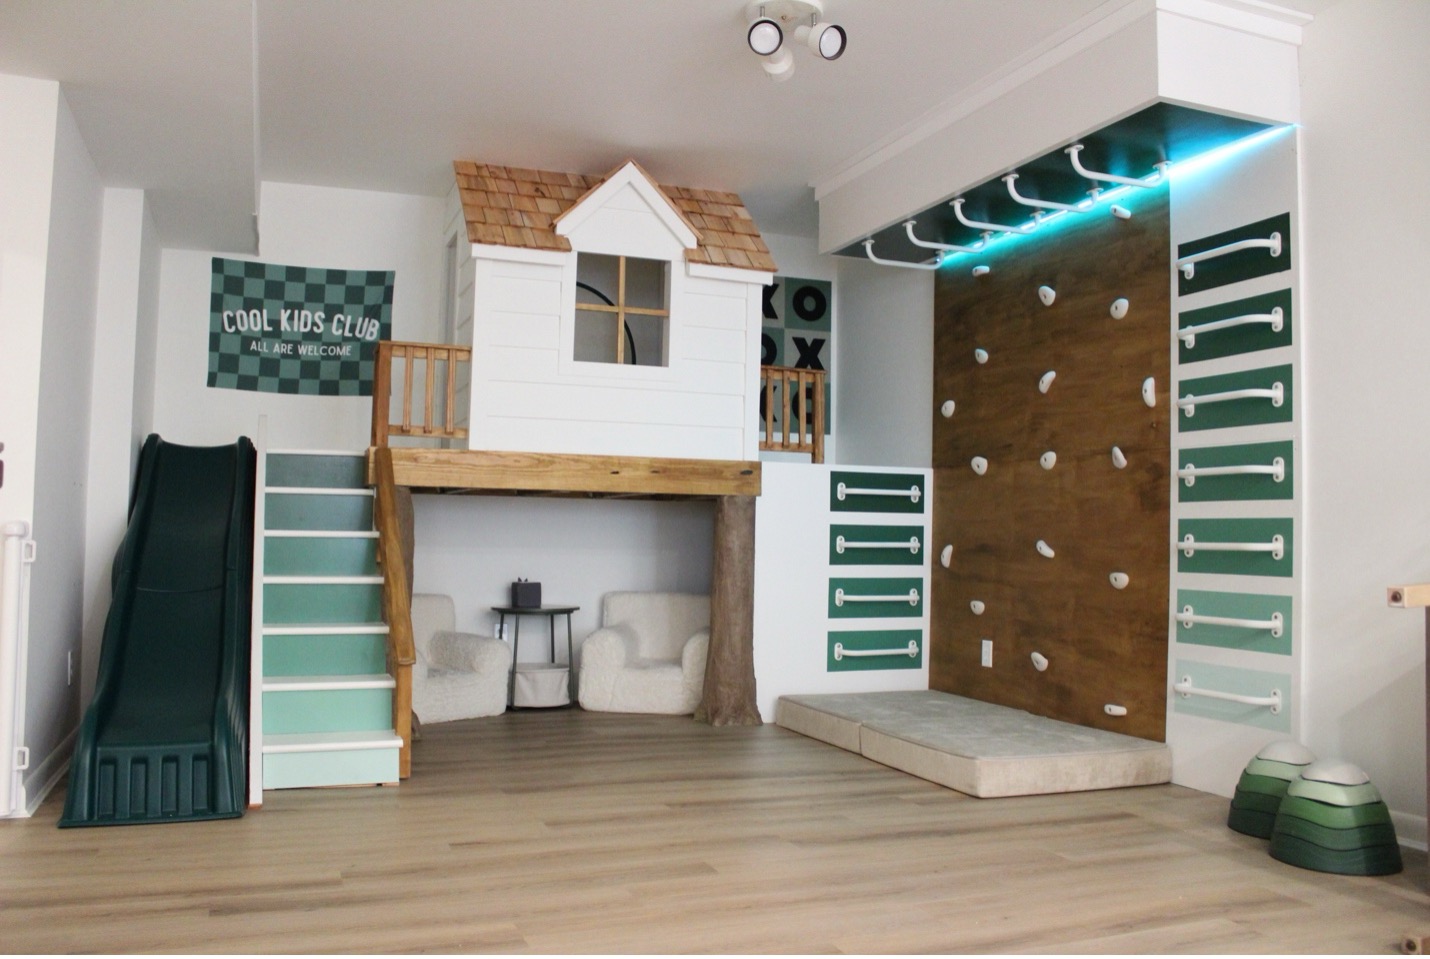

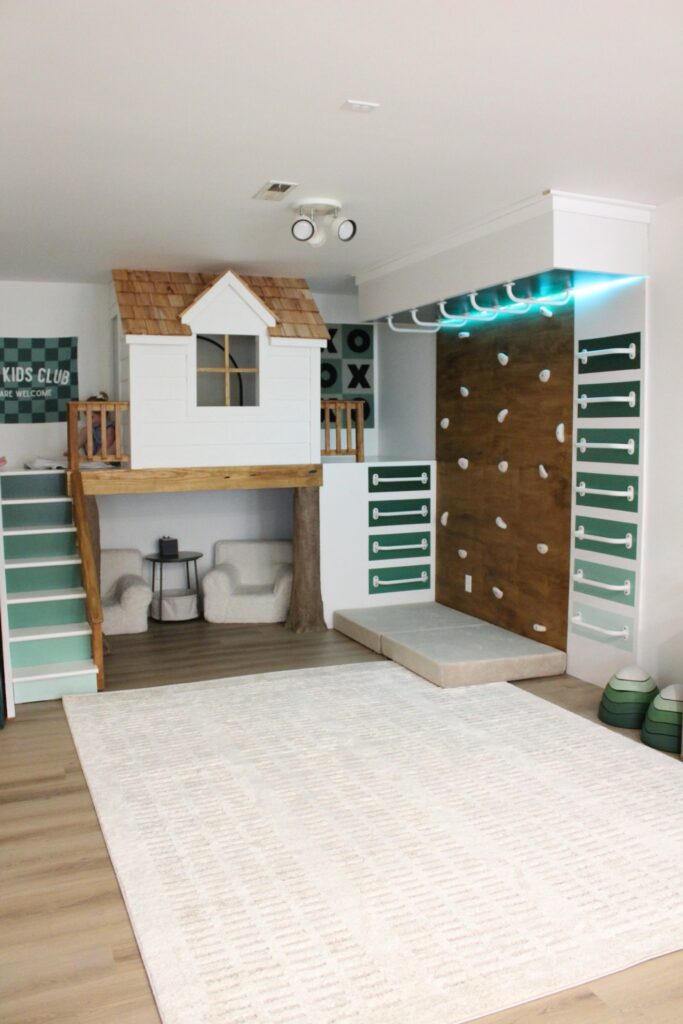
As parents of two little ones, we’re always looking for ways to burn energy, especially indoors during the colder months. So, we decided to transform a section of our basement into the ultimate DIY indoor treehouse play set. This play set was complete with a climbing wall, slide, monkey bars, and even tree-like posts to give it that authentic “backyard treehouse” feel. While it was a big project, it was definitely worth it!
Here’s a step-by-step breakdown of what we did and how you can build your own indoor play set.
Supplies We Used
- 4×4 pressure-treated posts
- 2×8 boards for framing
- 2×4 boards for playhouse walls and soffit framing
- 2×12 boards for stair stringers
- 3/4″ plywood (subfloor, climbing wall, soffit)
- 1/2″ sheathing plywood
- Lap cedar siding
- Cedar shake shingles
- Pine stair treads
- 3/4″ pine strips for window grids
- Exterior trim boards
- Ledger board + concrete anchors
- Joist hangers
- Liquid rubber roof membrane
- Thinset mortar
- Styrofoam insulation sheets
- Climbing stones
- Monkey bar handles
- Paint and wood stain
- Pocket hole jig + screws
- Construction adhesive
- Slide
Our Process
First, we started by removing the old wall paneling in the basement. Then, we installed a ledger board directly into the concrete wall. Next, we began framing a deck-style base using 4×4 posts, which were secured to the concrete slab. Afterward, we built the platform using 2x8s and joist hangers. Finally, we topped it off with 3/4″ plywood to create a solid floor.
We framed the playhouse walls using 2x4s and 1/2″ sheathing. Next, we covered it with lap cedar siding to give it that authentic outdoor look. For trim, we used simple exterior boards around the windows and corners. Similarly, the roof was sheathed in plywood, and then topped with real cedar shake shingles— because why not go all out?
3. Safe + Stylish Window Grids
To keep little climbers safely inside, we added 3/4″ pine grid strips across the windows, attaching them with pocket screws. As a result, they not only provide a cute, cottage-style finish but also serve a practical purpose.
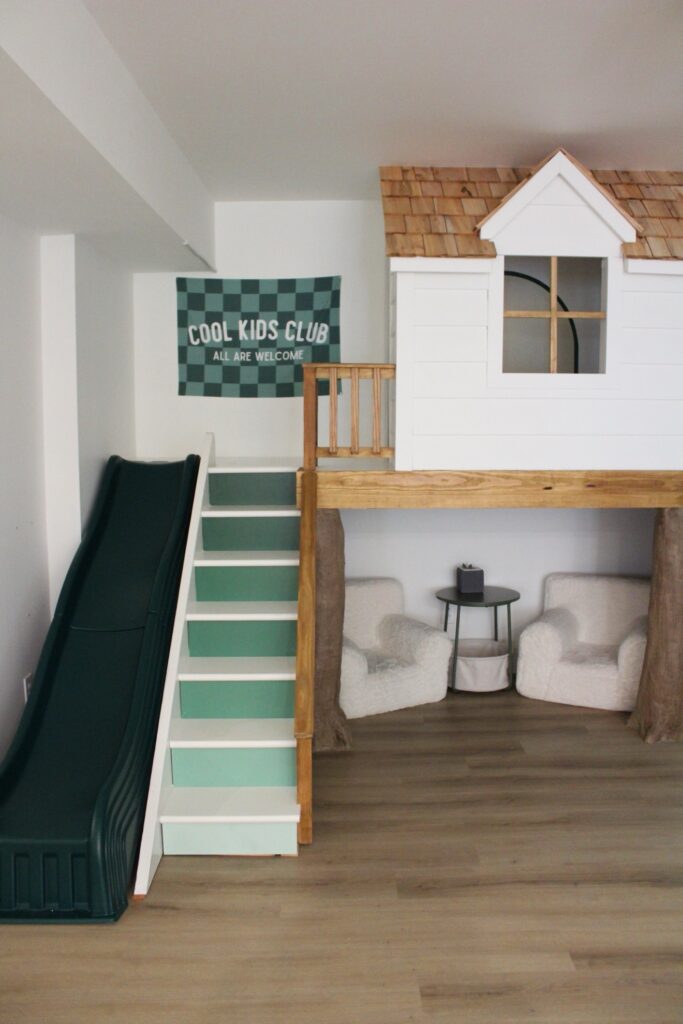
4. Stair Build + Ombre Painted Treads
Next up—stairs! We cut stringers from 2x12s and used pine treads from Home Depot. For a fun touch, we painted the treads in an ombre gradient from light to dark.
We ordered a plastic slide online and simply screwed it to the edge of the platform. Quick win.
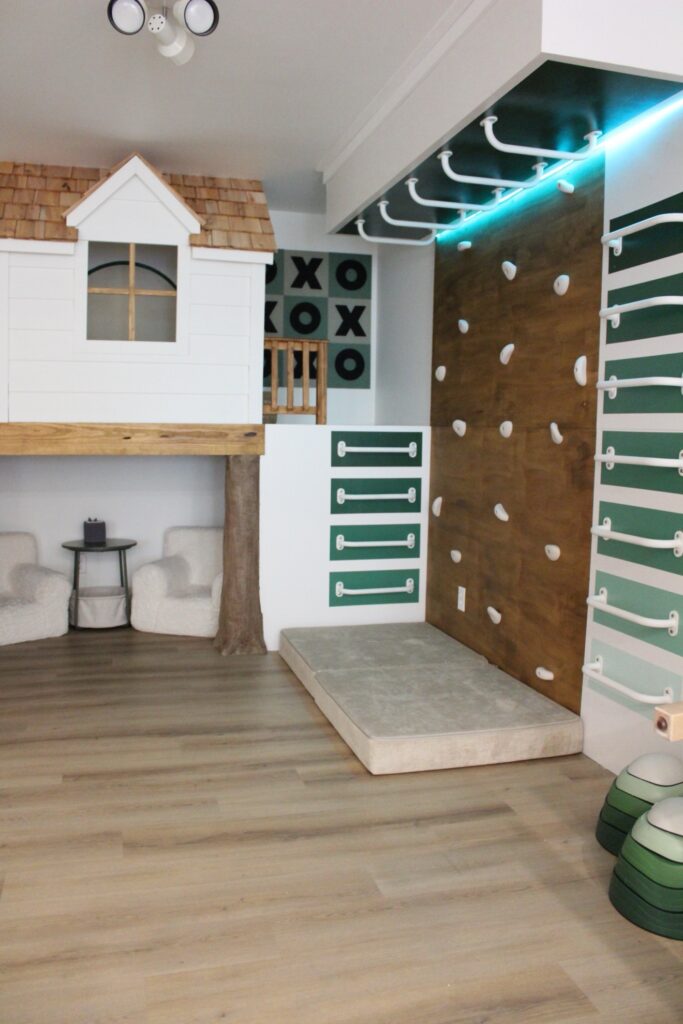
6. Rock Climbing Wall
We attached 3/4″ plywood directly to the basement wall (screwed into the studs) and installed colorful climbing stones. Then we stained the wall to show off the wood grain. However, painting it— maybe with a mountain mural — would be awesome too.
Given our tall ceilings, traditional monkey bars felt too high. So, we framed a soffit down from the ceiling using 2x4s and plywood, painted it, and then installed the monkey bar handles underneath. Additionally, we used the same handles in a vertical line on the wall to create a climbable ladder.
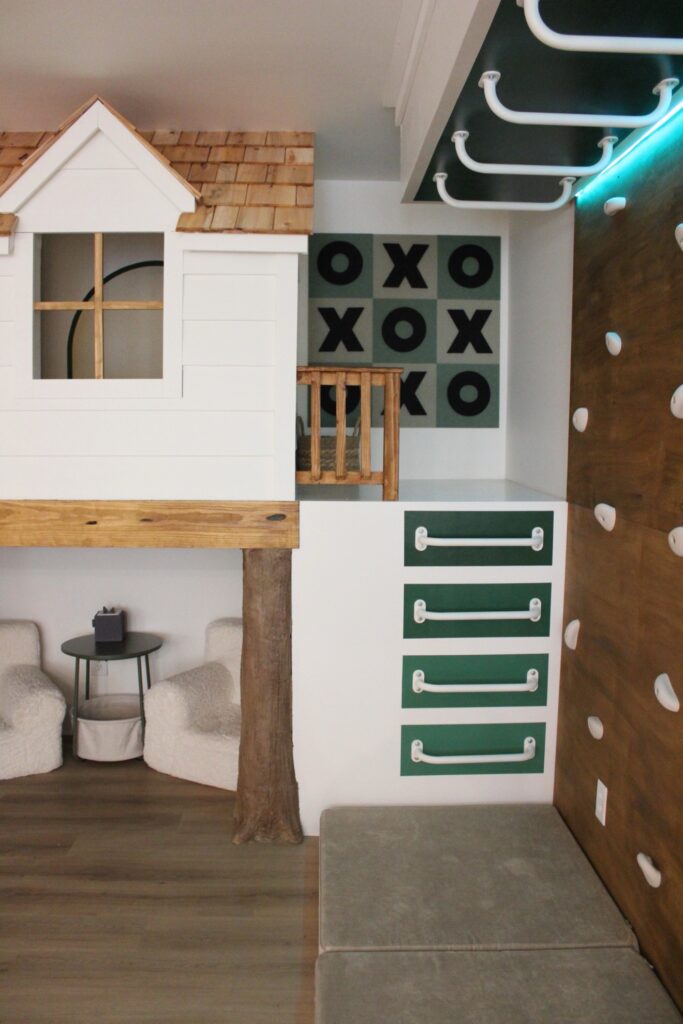
8. Faux Tree Trunks
To give the structure that magical treehouse vibe, we transformed the exposed 4x4s into “trees.” We wrapped them in carved styrofoam, coated them with a liquid rubber membrane, skimmed on thinset mortar, and painted them to look like bark. It’s such a fun, creative touch, and totally fooled our kids.
Final Thoughts
This was one of the most rewarding DIYs we’ve tackled. Not only did it push our skills, but it also allowed us to get creative in ways we hadn’t before. Most importantly, our kids LOVE it. Whether it’s rain or shine, winter or summer—this little playhouse has become their go-to adventure zone.
If you’re thinking about building one yourself, then go for it! Feel free to tweak it to fit your space, your kids, and your style. And, don’t forget to tag us if you do—we’d love to see it!


