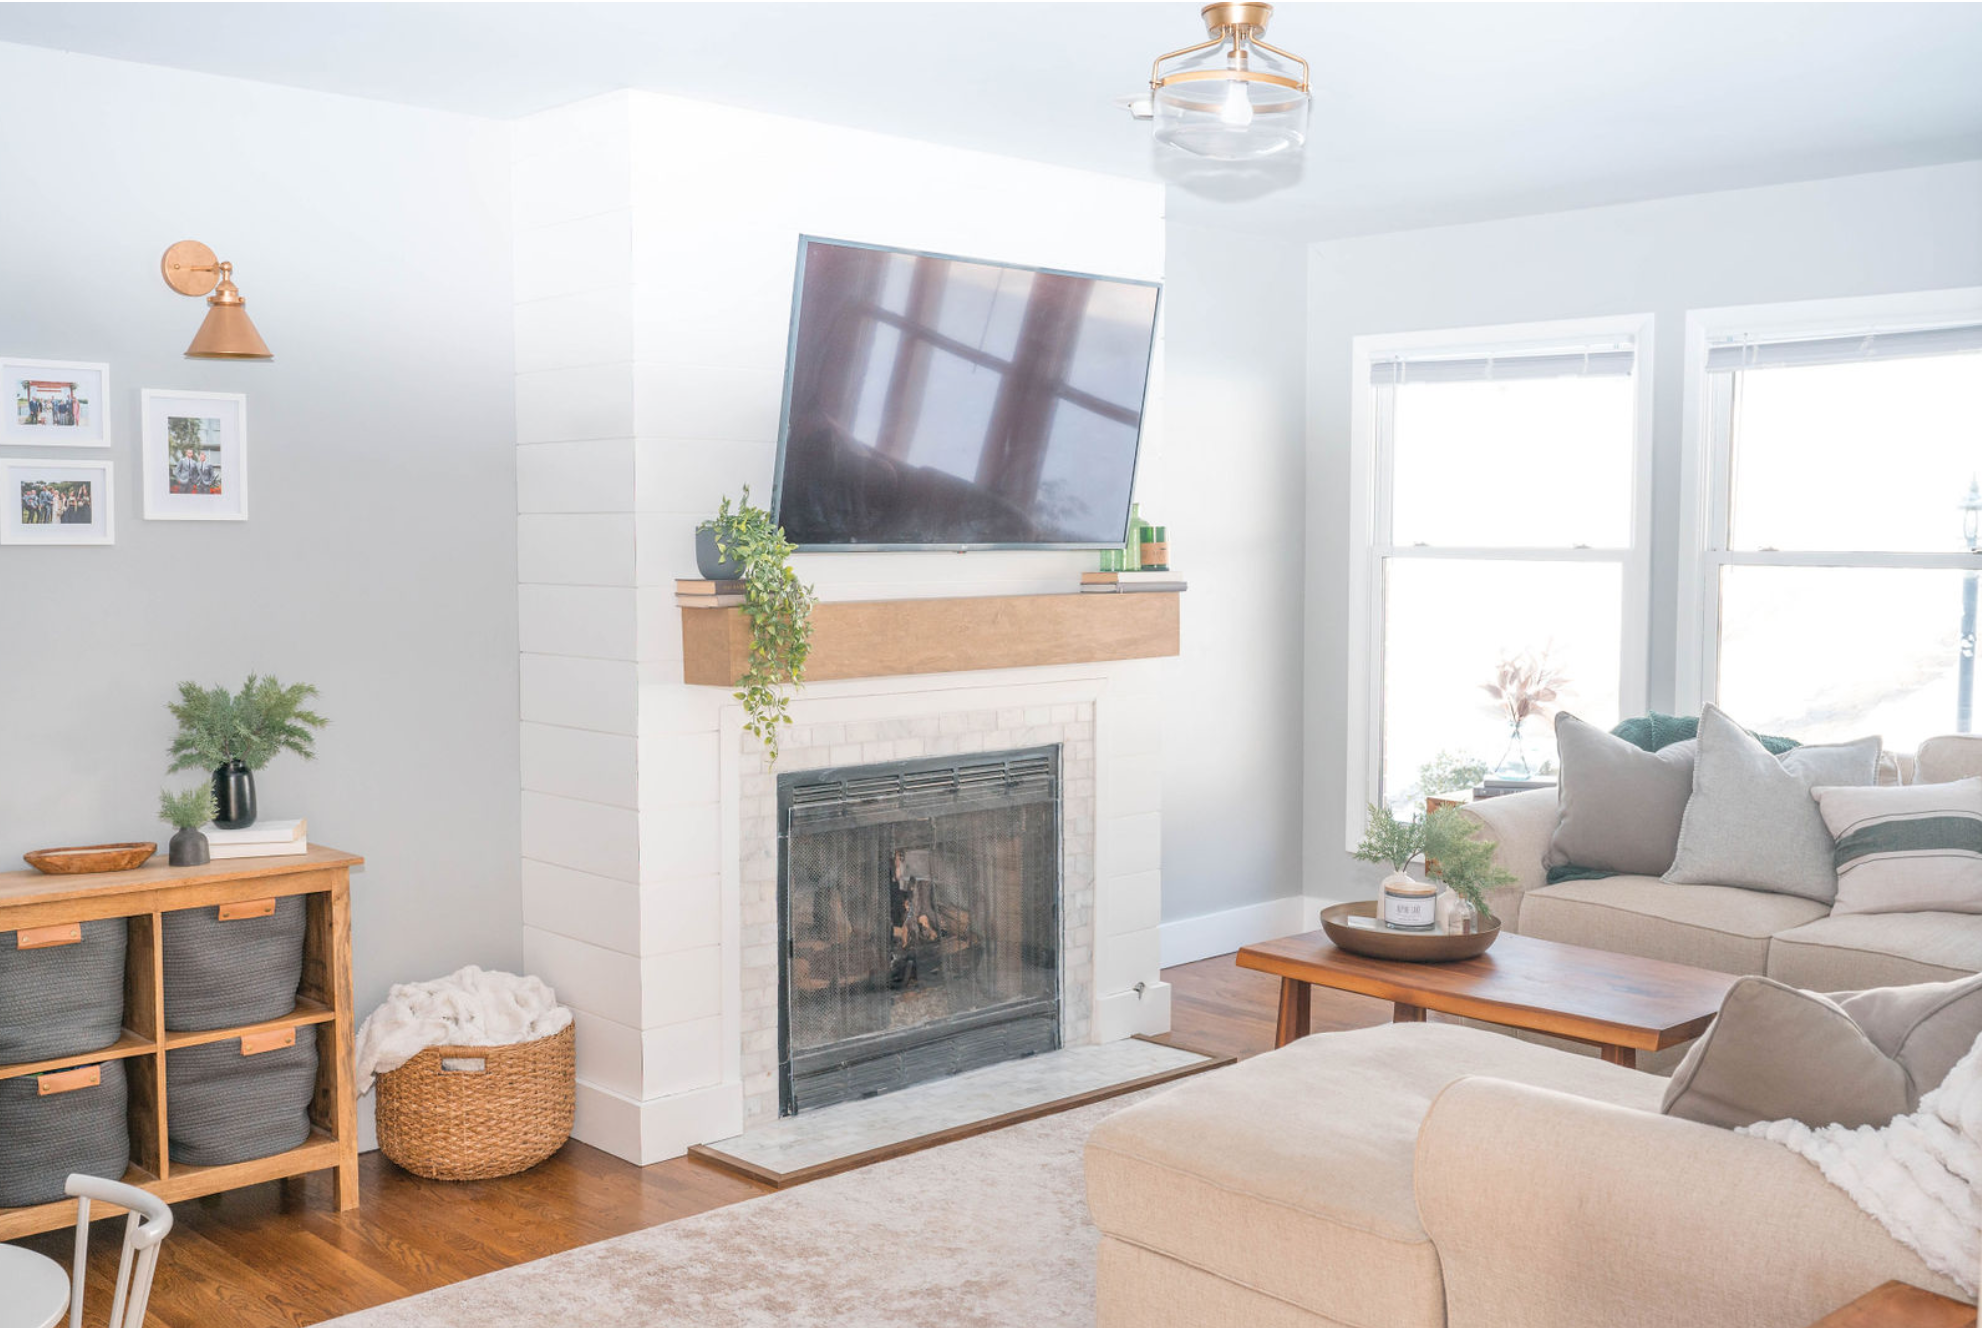

In most living spaces, fireplaces are a huge focal point in a room. That’s why I think it’s important to make sure they make a statement. When purchasing our home, our small living room had a very outdated fireplace that I knew needed some serious updating. The original fireplace was from when the home was built in 1994 with a forest green marble splash/hearth and a chrome gold fireplace with a traditional maple mantle above. To be honest, the fireplace was more of an eye sore in the room than a focal point.
The first thing we did was demo of course! We started by removing the green marble tile and the outdated mantle. We found some small marble tiles from floor and décor that seemed perfect for around the fireplace as well as on the hearth.
After tiling, I decided to remove the chrome fireplace doors to have the fireplace be open. I still wasn’t loving the chrome gold, so I used some high heat black spray paint to paint the fireplace grid.
We then picture-framed the fireplace with MDF 1×3 trim.
We were then ready to start ship lapping the wall the fireplace was on. The wall itself already jolted out a little into the room so we wanted to have that wall make a statement and set it apart a little from the other walls in our family room.
We bought some shiplap from a local wood supplier near our home, but both your local Lowes and Home Depot should carry some as well. The length and how much you will need will depend on how big the wall is you will be ship lapping. We also decided to shiplap the front and both sides of our fireplace wall. Besides shiplap here are some additional supplies you will need.
Supplies needed:
- White paint- I used Sherwin Williams pure white in matte
- Wood fill
- 18 gauge brad nail gun
- Tape measure
- Miter saw
Paintable caulk
The first thing we did was start measuring. Make sure when pulling your measurements to see what length you need to cut your shiplap to so that you aren’t just pulling one measurement on the wall and assuming that the wall continues to be that length all the way up. We started by measuring from the bottom and working our way up. In a home that is 30 years old you can’t guarantee that all of your walls are completely level, plumb or even and we did see that each shiplap measurement was different. By pulling each measurement individually we weren’t left with uneven gaps where the shiplap meets the back wall. However, if you are left with any gaps, caulk is your friend.
After making our cuts we were ready to install our shiplap. We used an 18 gauge brad nailer to hold each shiplap board in place. On the edges where the shiplap on the sides of the fireplace met the shiplap on the front of the fireplace we did miter cuts meaning we cut those edges at a 45 degree angle which gave us a very seamless look and made it look like one continuous shiplap piece.
After all our shiplap was hung, we used some wood fill to fill all our nail holes. After the wood fill dried, we sanded any excess wood fill on the front of the shiplap with 120 grit sand paper before painting the entire fireplace with a matte white paint.
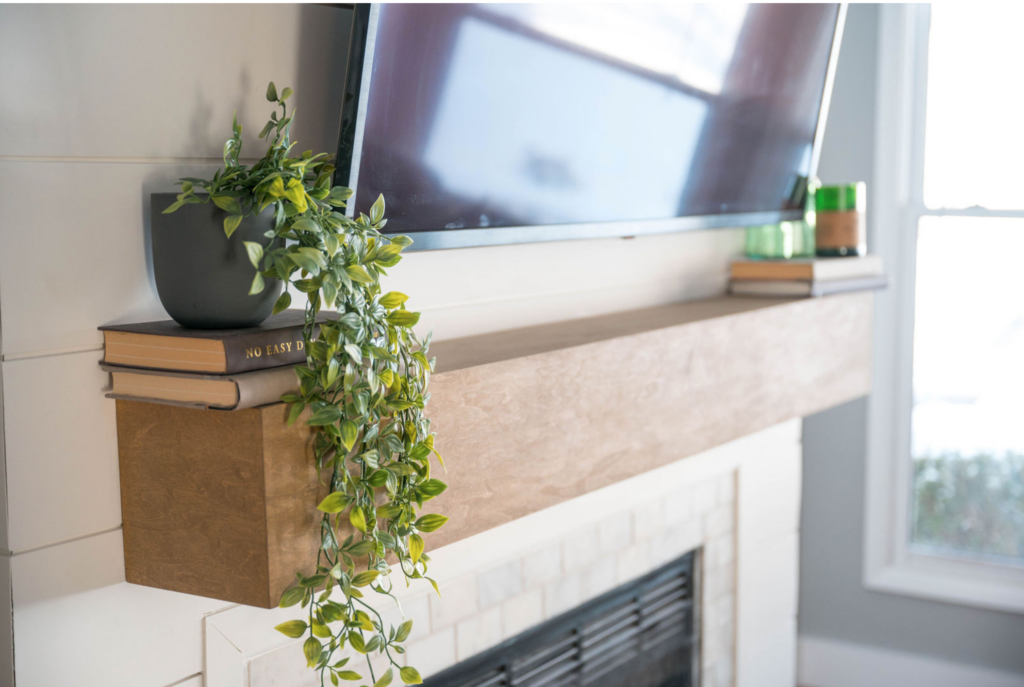
Lastly, we added a mantle we built out of wide stock maple. The intent was to have it look like a solid chunk of wood, but it is actually a hollow box with five pieces of ¾” maple mitered and glued together. The hollow cavity gives a nice space for a hidden, wall-mounted cleat for mounting. We went with a light stain and topcoat of satin polyurethane for a warm finishing touch. We’re very happy with how the fireplace turned out!


