

Flipping Houses is a thrilling adventure, filled with challenges and opportunities for creativity. In our latest project, we tackled the transformation of an old and dingy fireplace that desperately needed a makeover. From whitewashing the red brick to crafting a custom pine wood mantle, this DIY journey was both rewarding and educational.
Whitewashing the Red Brick
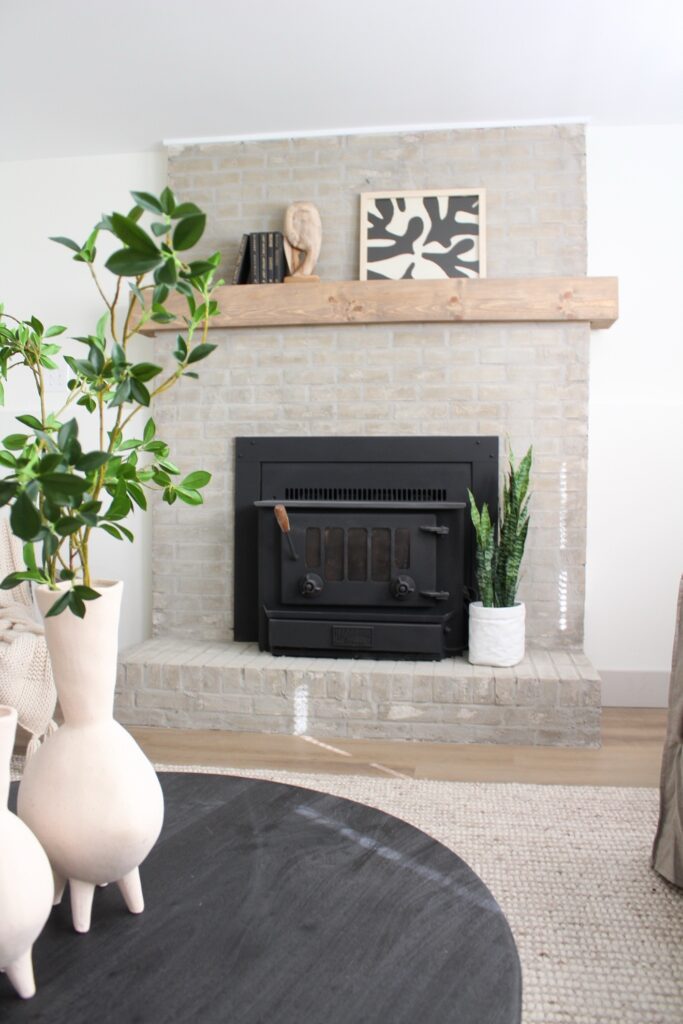
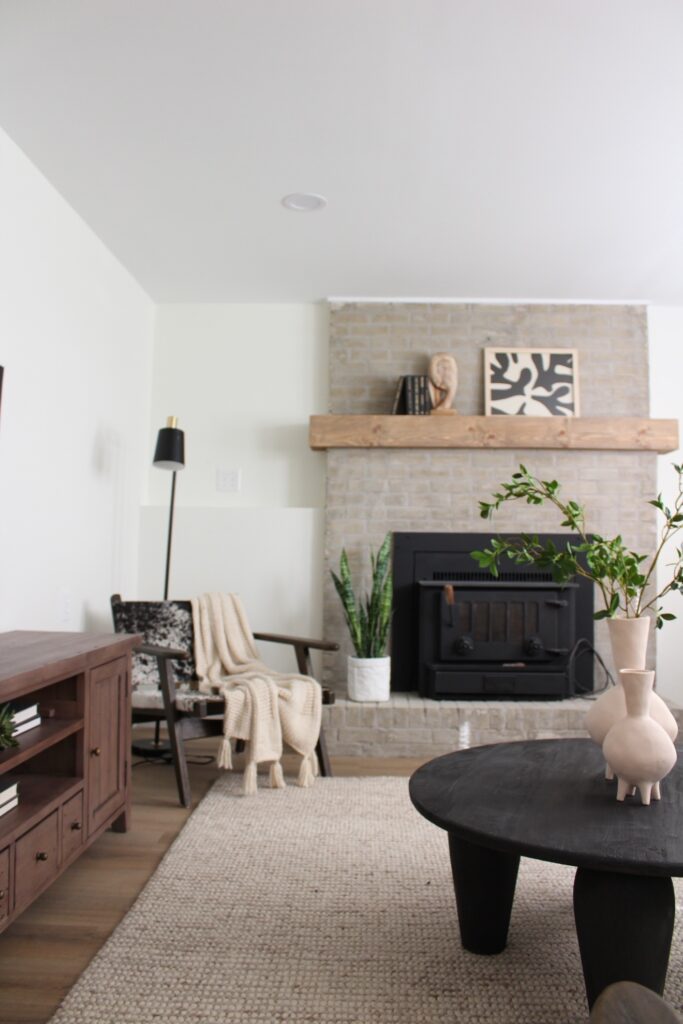
The first order of business was addressing the tired and outdated red brick that dominated the fireplace. To bring a fresh and modern look, we opted for the timeless technique of whitewashing. This process involves diluting white paint with water to create a semi-transparent finish that allows the natural texture of the brick to shine through.
After thoroughly cleaning the brick surface, we applied the whitewash mixture using a brush and then wiped off the excess with a rag. The result was a subtle, weathered effect that instantly brightened up the entire room. This cost-effective solution provided a neutral backdrop for the upcoming steps in our transformation journey.
Note: The color white paint I used was Alabaster by Sherwin Williams.
German Smear Finish for Texture
To elevate the visual interest of the whitewashed brick, we decided to apply a German smear finish. This technique involves spreading mortar over the brick and then strategically removing some of it to create a textured, rustic appearance.
Using a piping bag, we applied a thin layer of mortar to the brick joints. We selectively wiped away areas before the mortar dried completely, allowing the underlying whitewash to peek through. The result was a beautifully textured finish that added depth and character to the fireplace.
Matte Black Fireplace Surround
To add a touch of sophistication and contrast to the whitewashed brick and German smear, we turned our attention to the fireplace surround. Choosing a heat-resistant matte black paint was crucial to ensure durability and safety. Before applying the paint, we carefully taped off the surrounding areas to protect them from overspray.
We coated the fireplace surround evenly using a high-quality spray paint designed for heat-intensive surfaces. The matte black finish not only complemented the brick but also gave the entire fireplace a modern and cohesive look.
Crafting a Custom Pine Wood Mantle
No fireplace makeover is complete without a stunning mantle, so we set out to create a custom piece from pine. Mitering the edges for a seamless fit, we carefully glued and nailed the pieces together to form a sturdy and elegant structure.
After sanding the surface to perfection, we applied a rich wood stain to enhance the natural grain of the pine. The finished mantle was then securely attached to the existing mantel, framing the fireplace with a warm and inviting touch.
The transformation of our outdated fireplace was a testament to the power of DIY creativity. From whitewashing the red brick to the final touches of a custom pine wood mantle, each step added layers of character and charm to the space. This project not only increased the appeal of the house we were flipping but also served as a reminder that with a bit of ingenuity, any space can be turned into a stylish and welcoming haven. Below is a list of supplies we used. The best part is this whole fireplace makeover cost less than $50.
Supplies and Tools Used for this DIY


For the wood stain, we did a combination of walnut, weathered oak, and a whitewash.


