
I don’t know about you, but I love Oreos. I have loved them since I was a kid. My Oreo dream layered cake is my fun twist on one of my favorite simple childhood sweets. I promise it won’t disappoint.

What you need to recreate:
8″ board
- Oreos
- Star tip
- Drip bottle
- Chocolate cake (recipe listed below)
- Oreo mousse (recipe listed below)
- My buttercream
- Pipping bags
- 6″ round cake pans
- Semisweet chocolate chips
8″ cake box
Step 1: Make Chocolate cake.
One of my favorite chocolate cake recipes and what I personally used when making my chocolate dream layered oreo cake is Hershey’s perfect chocolate cake
Step 2: While cakes are in the oven, make Oreo mousse. I promise this is easy!
Oreo Mousse Recipe
Ingredients
- 1 pint of heavy whipping cream
- 1/3 cup of powdered sugar
- 1 gelatin packet
- 1/2 of white chocolate chips
- 1/2 cup crushed Oreos
Directions
Combine one packet of gelatin and 1/3 cup hot water in a small bowl. Place the bowl into the refrigerator once the gelatin is mixed and there are no clumps. While gelatin sets up, whip heavy whipping cream and powdered sugar in a kitchen aid mixer with a whisk attachment on high until heavy whipping cream holds its shape. Once the gelatin is set up and whipping cream has soft peaks, melt your white chocolate (you can do this in a microwave, microwaving 30 seconds at a time). After white chocolate is completely melted, microwave gelatin for 60 seconds. Be careful when removing it from the microwave; it will be hot! Start whipping heavy whipping cream again on high while slowly adding 1/2 gelatin and melted white chocolate. Discard the remaining melted gelatin. Once mixed, add 1/2 cup of crushed Oreos and refrigerate for 30 minutes before using as a cake filling.
Step 3: Make the buttercream. Check out my buttercream recipe.
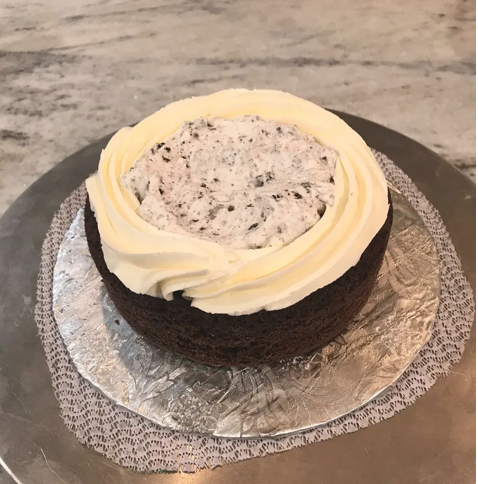
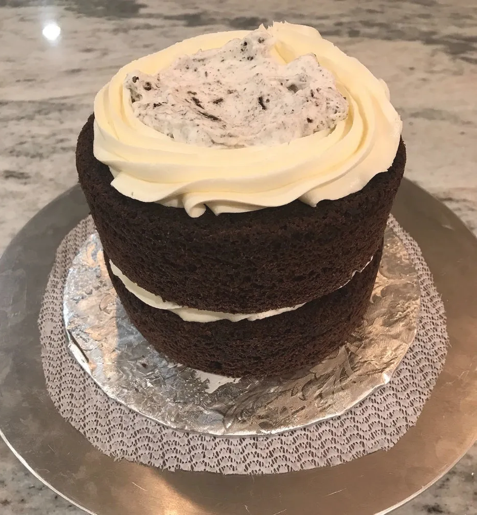
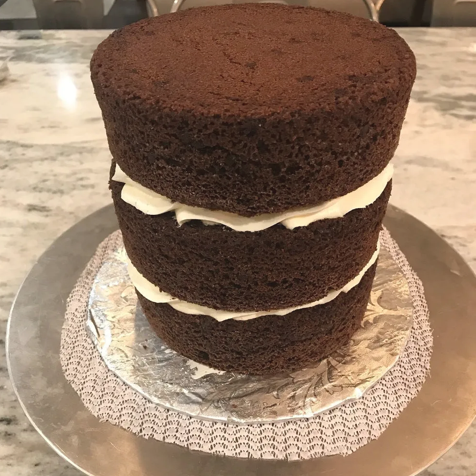
Step 4: After your cakes have cooled and mousse has been set up in the refrigerator for at least one hour, it is time to start assembling. Fill a piping bag with a star tip with buttercream, then trim each cake using a serrated knife and your 6″ cake pan as a guideline. Once cakes have been trimmed, it’s time to start stacking. With each layer, you will want to pipe a large circle around the cake to prevent the mousse from spilling out. Refer to the pictures attached.
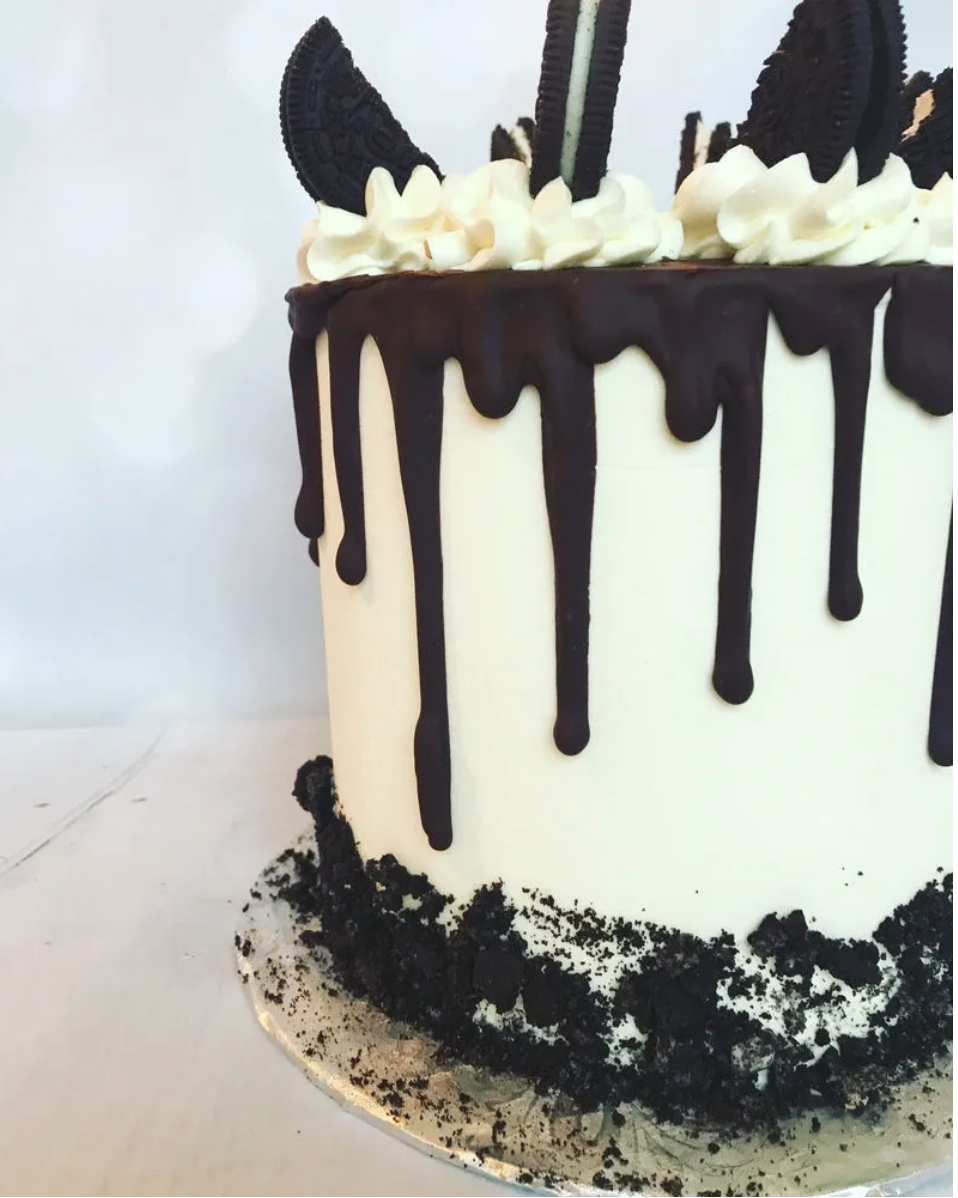
Step 5: Once your cake is assembled, it is time to start “dirty icing” (putting your first layer of buttercream on the cake, also known as crumble coating). I usually apply icing to my cakes 3 times. After every application, I let them sit in the refrigerator for at least 15 minutes. After you feel like you have applied enough coats of icing to your cakes, you can then scrape the side and top of your cake to create a smooth, flawless look.
Step 6: Melt semisweet chocolate chips. If you find your chocolate is too thick to create your desired “drip” look, you can add a teaspoon of Crisco. Fill your dripper bottle with melted chocolate, then start applying chocolate to all edges of the cake.
Step 7: Using the same piping bag you used for layering, pipe rosettes onto the top of your cake. The best advice I can give is to start by piping all four corners first to avoid running out of room or creating an uneven number.
Step 8: Top rosettes with half of an Oreo. Cut cake and enjoy!


