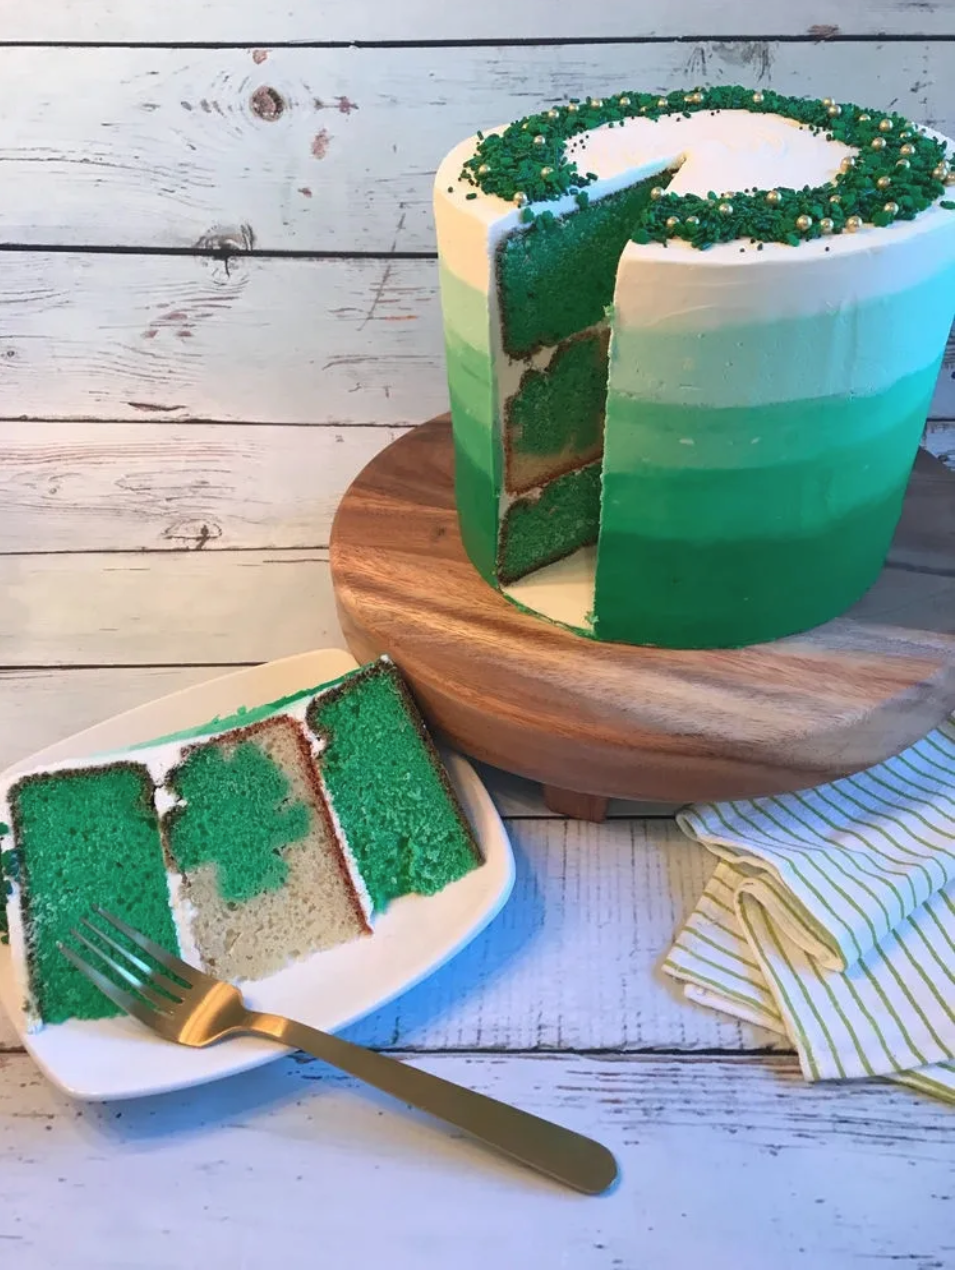

St Patrick’s Day Ombre Cake with a Shamrock in Every Slice
This cake was so much fun to make! The best part is that it is incredibly easy to make, and it will blow your guests away when they make that first cut. Lately, I have found that I enjoy simple cakes the most. Simple, sweet, and elegant. Don’t get me wrong, I love when someone challenges my baking skills by asking for a golf bag cake or a cake that looks like a car. It’s just that I find baking simply to create something pretty equally as enjoyable. Hopefully, you will enjoy it too! I hope this post helps you create the St. Patrick’s Day cake you desire! Feel free to reach out to me with any questions or feedback!
What you’ll need:
- 1 batch of my Italian Buttercream or 2lbs. of Wilton decorating icing
- 2 sets of my French Vanilla Cake or 2 boxes of french vanilla cake mix
- 1 bottle of Americolor food green coloring
- 3-4 bottles of different sprinkle
- 5 pipping bags (no need for tips!) 3-6″ Round Pans
- 1 Cookie Sheet
- 1 Shamrock Cookie Cutter
- 8″ Round Cake Board
The Essential
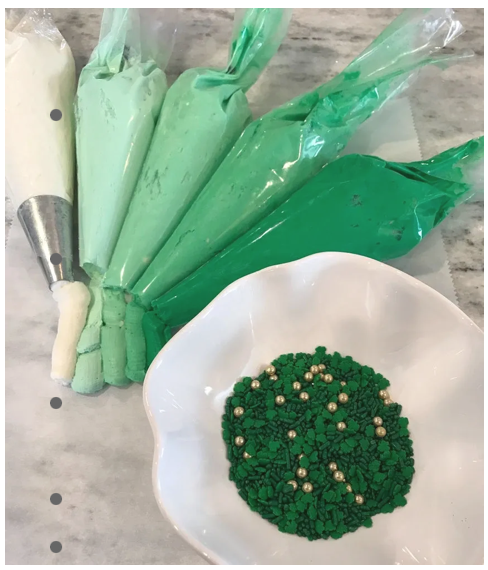
Divide/dye buttercream: To get started, you will need 2lb of Buttercream that you will need to divide into 5 different bowls, having one bowl contain about twice as much as the other four. This large bowl of Buttercream will remain white, while the others will be dyed different shades of green. I used a homemade Italian buttercream because I prefer its pure white color, but you can always buy a pre-made buttercream if you’re a beginner.
(I will post my personal Italian buttercream recipe in a future blog)
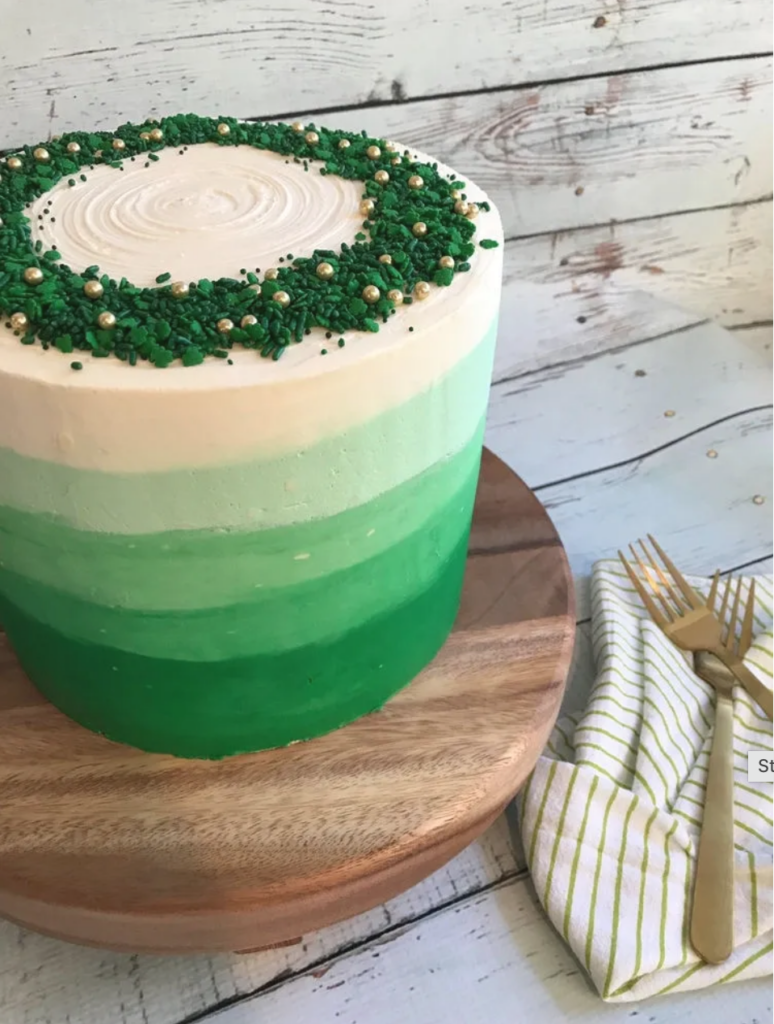
Now it’s time to add the ombre effect! I use Americolor food coloring to dye my Buttercream, but whatever brand you prefer is fine. The key will be to go heavy on the first bowl (about 3-4 drops of dye) to reach your desired dark green color, then you’ll just add less coloring to each bowl as you go so that the colors continuously get littler. You’ll want your last bowl of Buttercream to be practically white with just a hint of light green (I recommend using a toothpick drop of dye). Once this is done, we can move on to sprinkles! You’ll want to mix a few different types of sprinkles together in a small bowl and then set it aside until it’s time to decorate. I used edible gold sugar pearls, small shamrock sprinkles, and two different shades of green jimmy sprinkles, but feel free to use whichever ones catch your eye!

How to get Shamrocks inside the cake
I promise it’s simple! I started off by making my french vanilla cake.
Feel free to use your favorite cake recipe or if you’re crunched on time, buy a boxed french vanilla cake mix. Before making your cake batter green, you’re going to want to pull some batter out and set it aside for your white color middle tier, which we will assemble in a future step.
Note: Pull enough batter to fill a round 6″ pan halfway.
The next step is to create the green batter for the top and bottom tiers of your cake, as well as shamrocks for the inside of the middle tier. Add a few drops of green food coloring into the batter, darkening it to your desired shade of green. Divide the batter 3 ways: half of the batter is split equally into two 6″ greased pans, the other half goes on to a greased cookie sheet. *bake* (temperatures and times will vary, refer to cake recipe).
Note: Your cookie sheet cake will be done much quicker than your 6″ cakes.
Once your cookie sheet cake is out of the oven and cooled, you can start cutting tiny shamrocks out of it. As you cut your shamrocks, you’ll want to be lining them in a 6″ pan, as shown in the picture above (make sure they are all sitting the same way). After your pan is completely lined, you’ll want to pour the remaining white batter into the pan with the shamrocks. After all tiers are cooled and baked, it’s time to start having some fun! (I usually bake a day ahead and let my cakes sit in the fridge overnight, so they are completely cooled and durable)
Now for the Fun!
You will need to trim all your cakes before stacking. I usually put my cakes back in the 6″ pan I baked them in and trim the top off the cake using the pan as a guide for my knife. Once all cakes are cut, you can start stacking. Make sure you put a layer of Buttercream between each tier. After the cake is stacked, you can ‘dirty ice’ it with white Buttercream. The term ‘dirty icing’ simply means putting a thin layer of Buttercream on the cake. After dirty icing the cake, place it in the refrigerator for 15-20 mins. By doing this, your cake will be more durable and prevent the tiers from moving around on you.
All Together Now
The video above will help you create the desired ombre look. Please reach out if you have any questions! I’d also love to hear your feedback on what future posts you would like to see! Enjoy!


