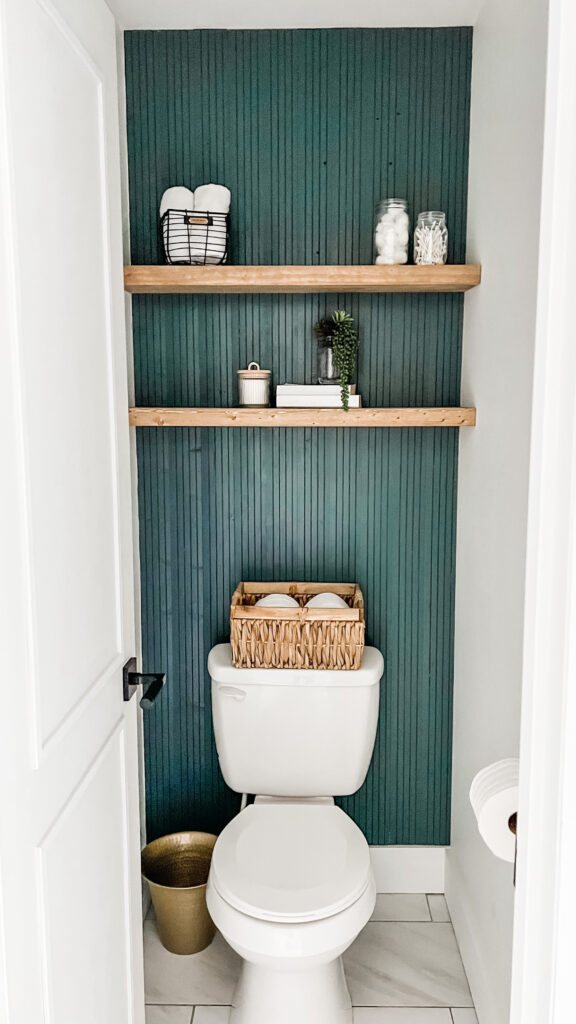
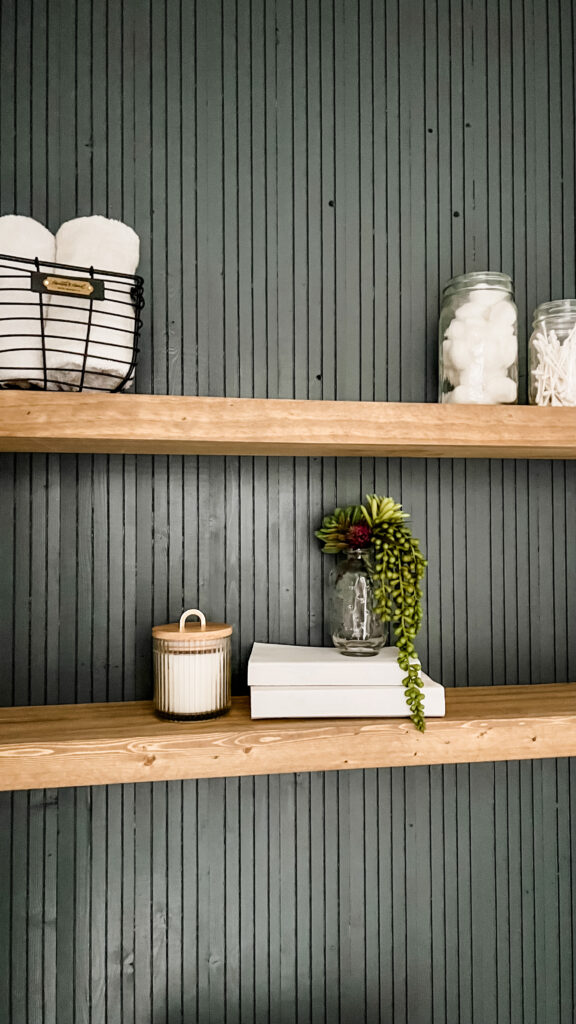
Our little toilet room project was an excellent opportunity to utilize everyone’s favorite design item: floating shelves! Since we wanted a seamless look and didn’t want to see exposed shelf brackets, we were fortunate that the small space allowed us to span wall to wall and use hidden cleats. The process of making and installing these shelves is relatively simple and intuitive.
Essentially, we want to create a plywood sandwich with a cavity in the back and sides for a hidden cleat. Here’s how we did it:
Supplies needed:
- 1/2” Plywood
- 1”x3” pine board
- Wood Glue
- 18 Gauge nail gun
- Table Saw
- Chop saw
- Level
- Stud finder
- Drill/impact driver
How to build floating shelves?
We started by taking a rough measurement of the width of the toilet room – roughly 36”. Since this was behind and above a toilet, we didn’t want the shelves to project out into the space too much, so we picked 6 3/4” as a safe depth. Once we had our rough dimensions, we started by ripping the ½” plywood into 6” strips (this allowed for ¾” face piece to leave us with six ¾” overall depth). Next, we crosscut our plywood to 36 1/2” – knowing 36” was the rough dimension, this made sure we would be safely long. Because I wanted the height of the shelves to be 1 3/4”, so working backwards, I subtracted two pieces of ½” plywood and found out that my middle cavity would be ¾”.
I then ripped down pieces of pine to ¾” x ¾” to use as my build-up in the cavity. I ran one piece the whole width of the front and glued it and shot it in. On the sides and back, I held my buildup pieces 1” from the edges. This is so the wall-mounted cleats would have a place to go. Once these are glued and shot in, I put another piece of plywood on the top (creating the sandwich!) and glued and shot those on.
*Important – be wary of your nail depths, so you don’t shoot through the finished face of the shelf*
Next, I cut a piece of pine into 1 ¾” x 36 ½”. Glued it and shot it on the face of the shelf. From here, you can fill nail holes, sand all finished faces and stain with a color of your choosing.
For the Hidden Cleat
We ripped pieces of pine ¾” x ¾” LIGHT (just short of the measurement) to allow the shelf to slide on. We found studs, marked out level lines and screwed the cleats to the back and side walls. For shelves this short (6” deep), it’s unlikely that there will be studs to screw into. So we used drywall anchors on the sides. Take final measurements on the exact widths and cut the shelves accordingly. Finally, the shelf should slide straight on. You can use a trim head screw from a discrete location to secure the shelf to the cleat. Throw on some decorations, and that project is done!
Here is a quick little video showing you a step-by-step!