

If you want to add charm and character to your space without breaking the bank, you’re in for a treat. Today, we’re diving into the world of board and batten accent walls – a simple yet effective way to elevate the style of any room. Get ready to roll up your sleeves and let’s turn that blank wall into a focal point that’ll have your guests asking, “Where did you get that?”
Why Board and Batten?
First things first – why board and batten? Aside from being an affordable option, it adds a timeless, architectural element to your space. It’s like giving your walls a tailored suit, instantly transforming them from drab to fab. The best part? You don’t need to be a carpentry whiz to pull this off. Let’s break it down step by step.
Materials Needed:
- Primed boards (for battens) 1×4’s
- Saw (a miter saw works wonders)
- Nail gun – 18 gauge
- Level
- Wood glue
- Paint or stain of your choice
- Sandpaper
- Caulk
- Wood fill
Step 1: Measure Twice, Cut Once
Before you start cutting, take the time to measure your wall. This ensures that your battens are evenly spaced and symmetrical. Once you have your measurements, cut the 1×4 boards into strips for the battens. Don’t forget to sand the edges for a smooth finish.
Step 2: Layout and Level
Use your level to mark a straight line where the bottom batten will go. This is your starting point. From there, use the level to guide the placement of the battens and boards. Make sure everything is level and visually appealing before securing them to the wall.
Step 3: Secure and Glue
Once you’re happy with the layout, use your nail gun (or hammer and nails) to secure the battens and boards to the wall. A dab of wood glue on the back of each piece will provide extra stability.
Step 4: Header and Cap
Once your uprights are nailed in place, measure and cut a 1×4 to go across the top and create a header. Next, rip a 1×4 to 1 ¼” and lay it flat on top of the header to create a cap piece that projects from the header and nails it in place.
Step 5: Fill and Caulk
After everything is securely in place, fill any nail holes with putty and caulk the edges for a seamless look. This step is crucial for achieving that polished finish that makes your DIY project look like it was done by a pro.
Step 6: Paint or Stain
The final step is to add your personal touch. Paint the boards and battens in a color that complements your existing décor or go for a classic white for a clean, sophisticated look. If you prefer the natural wood look, a stain can enhance the grain and add warmth to the space.
And there you have it – a stunning board and batten accent wall that didn’t cost an arm and a leg!
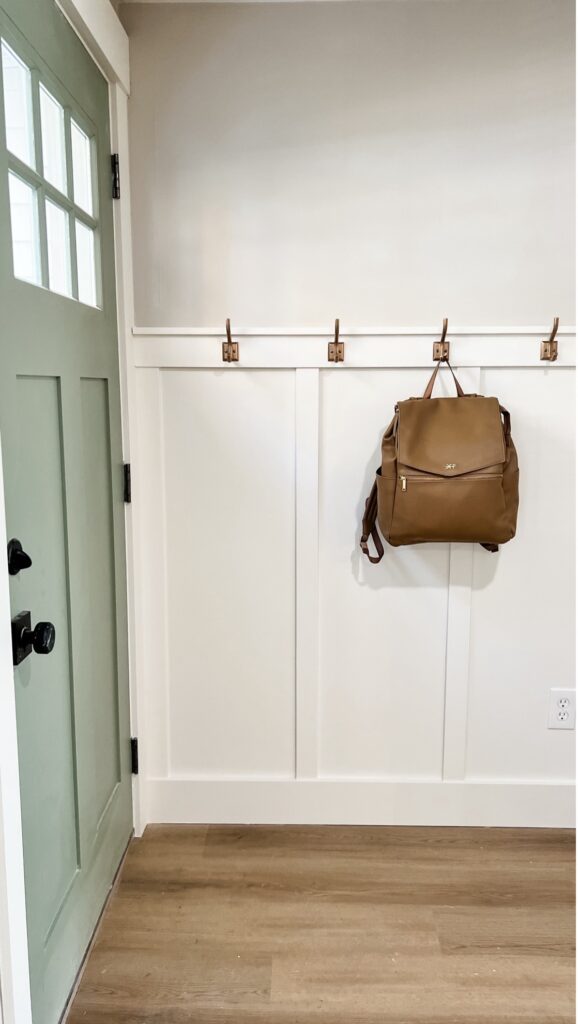
We also added some hooks to ours for a perfect drop station for coats and purses when you walk into the room.
Why Board and Batten Rocks…
- Affordability. These materials won’t break the bank, making this a budget-friendly project.
- Timeless Elegance. Board and batten never go out of style, adding a touch of class to any room.
- DIY Satisfaction. There’s nothing like stepping back and admiring a project you did with your own two hands.
So, what are you waiting for? Grab your tools, pick up some materials, and let your creativity flow. Transforming your space has never been this fun and affordable!


