
As our little girl has grown and it was time to transition her out of her crib and into a big girl bed, we wanted to create a space that reflects her evolving personality and interests. For Reese, this was mermaids. She loves everything mermaid so we knew this would be the perfect theme for her “big girl” bedroom.
In this blog post, you’ll find the steps we did to create her mermaid room, links to all materials used, and a few DIY projects such as a closet dollhouse and a DIY day bed. Hopefully, this sparks as much joy and excitement for you as it did for us, and you are inspired to create a space for your kids as they transition to their big-kid rooms too!
How to create a “big girl” bedroom?
First, decide on a theme and make selections!
One of our most enjoyable aspects of transforming Reese’s bedroom into a “big girl” bedroom was letting her select a theme or color scheme.
Letting her be part of the decision-making process, and allowing her to express her preferences and interests was so much fun. I would recommend doing this to any parent whether it’s their kid’s favorite color, a beloved character, or a specific theme like animals or princesses.
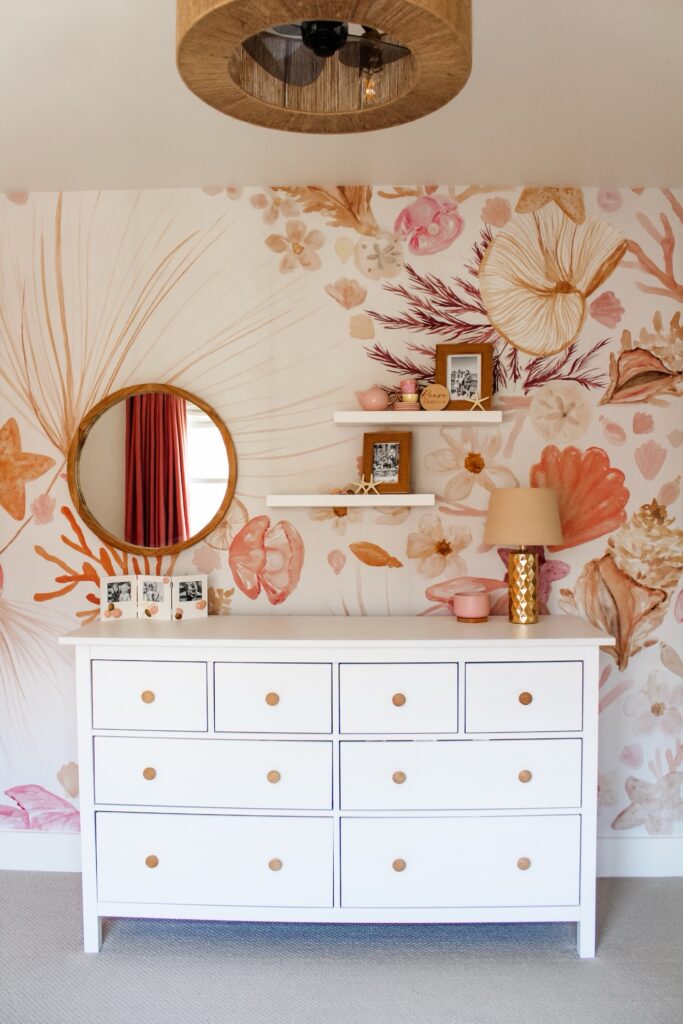
There were a few different ways to incorporate a mermaid feel to Reese’s room through wallpaper, paint, and décor. As for the wallpaper, we went with a beautiful peel-and-stick wallpaper from Wallblush called Bleachy Keen.
I loved all the different colors this water and sea wallpaper had and knew those colors would be perfect to play off of in other aspects of the room.
Next, update the door and window trim and baseboards.
When we bought our home it had outdated baseboards and door trim. It can be pretty costly trying to update all of these throughout a whole house at once so what we have done instead is room by room as we renovate we update the baseboard and trim. Here is a quick little video showing the process of doing it. We prefer a craftsman-style look.
Now, start painting!
Paint can make such a big impact in a space and Reese’s bedroom was a great example of that. After updating all her trim, we gave the entire room a fresh coat of paint. Knowing I was going to have a colorful accent wall and a wall of wallpaper I wanted to go with a neutral color on the walls so I went with one of my favorite paint colors called alabaster from Sherwin Williams. I did this for the trim, walls, and ceiling.
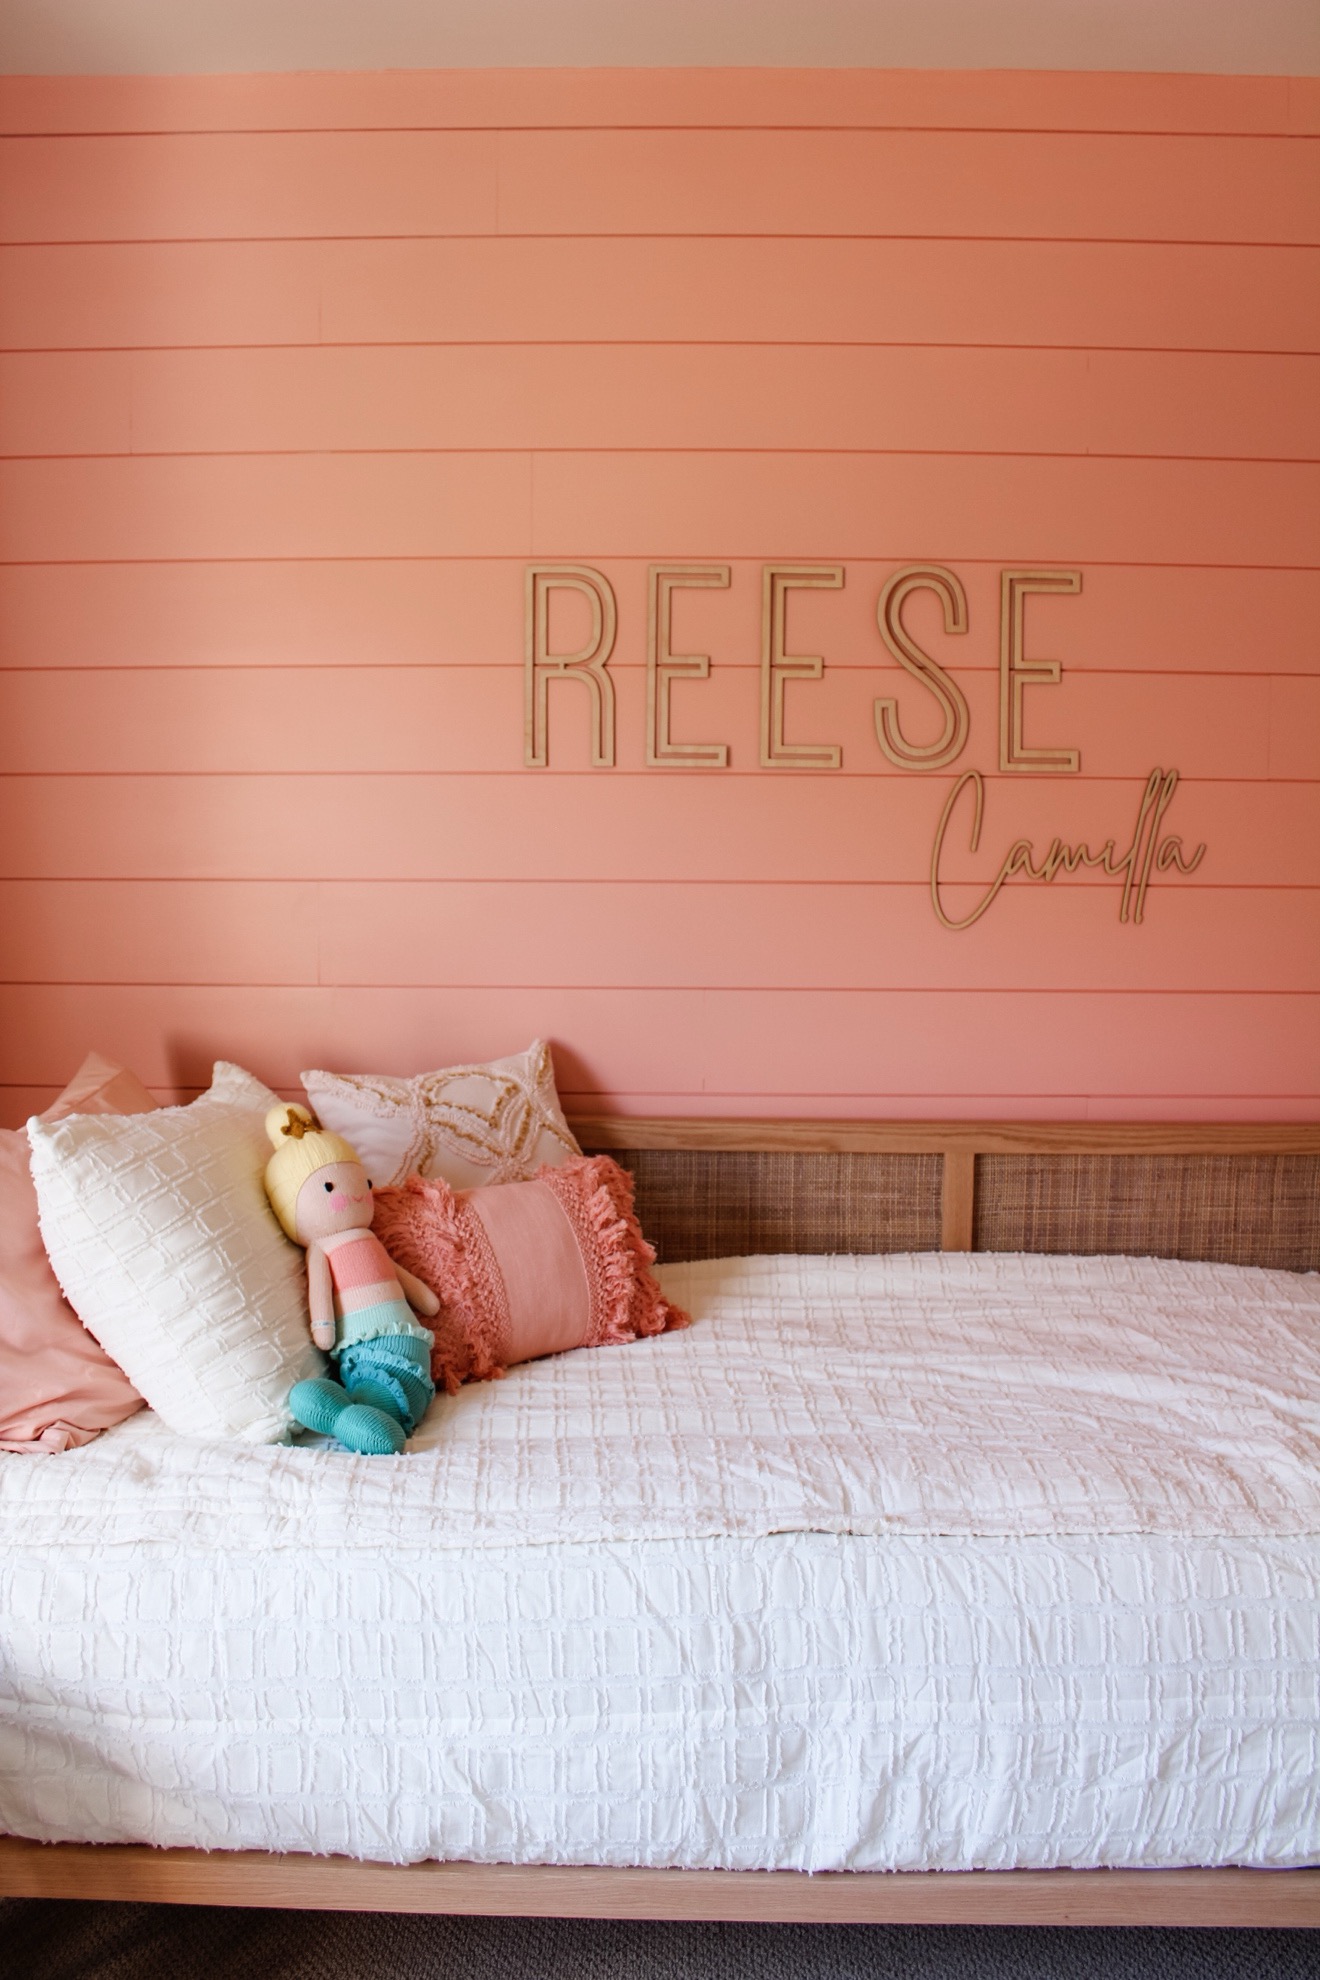
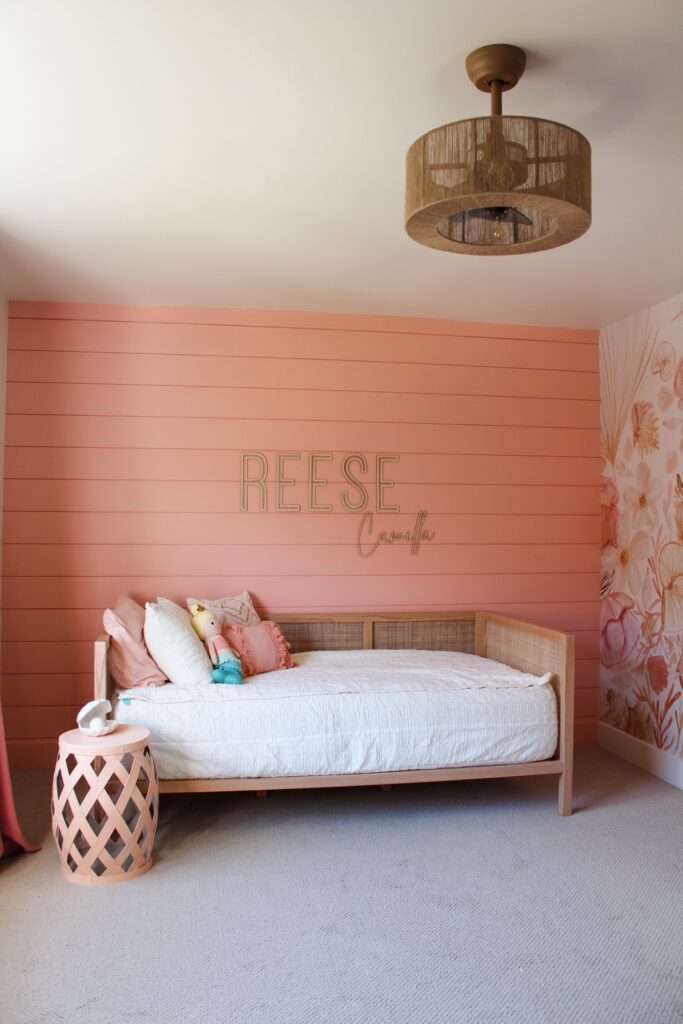
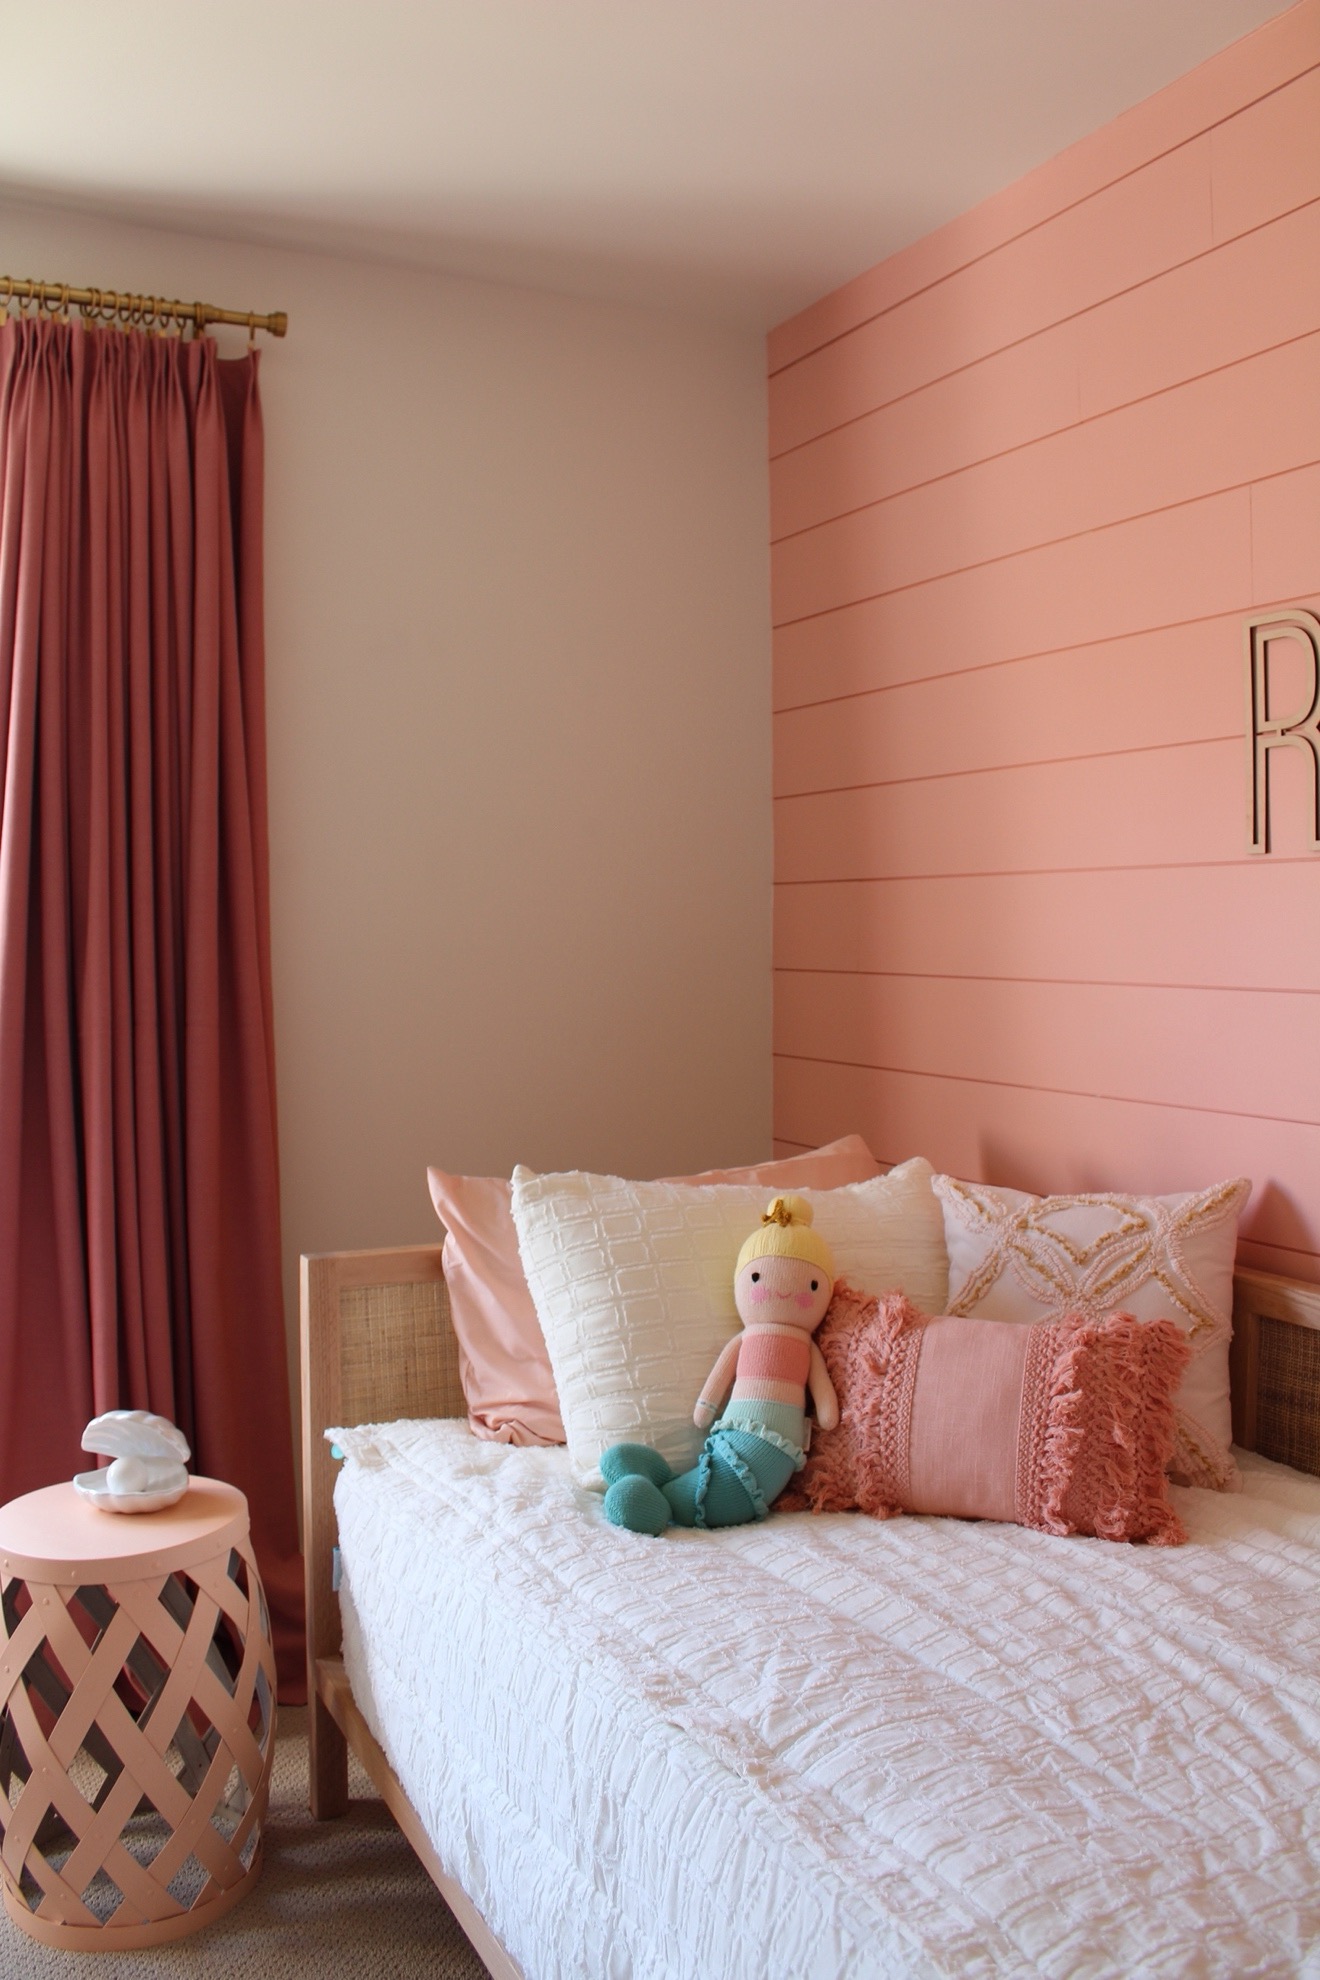
In addition to the one accent wall with wallpaper, we also added a shiplap wall to go behind Reese’s day bed. This added a fun pop of color to it that tied perfectly to her new wallpaper. The color we went with was called Rachel Pink by Sherwin Williams. It was a perfect mix of coral and pink.
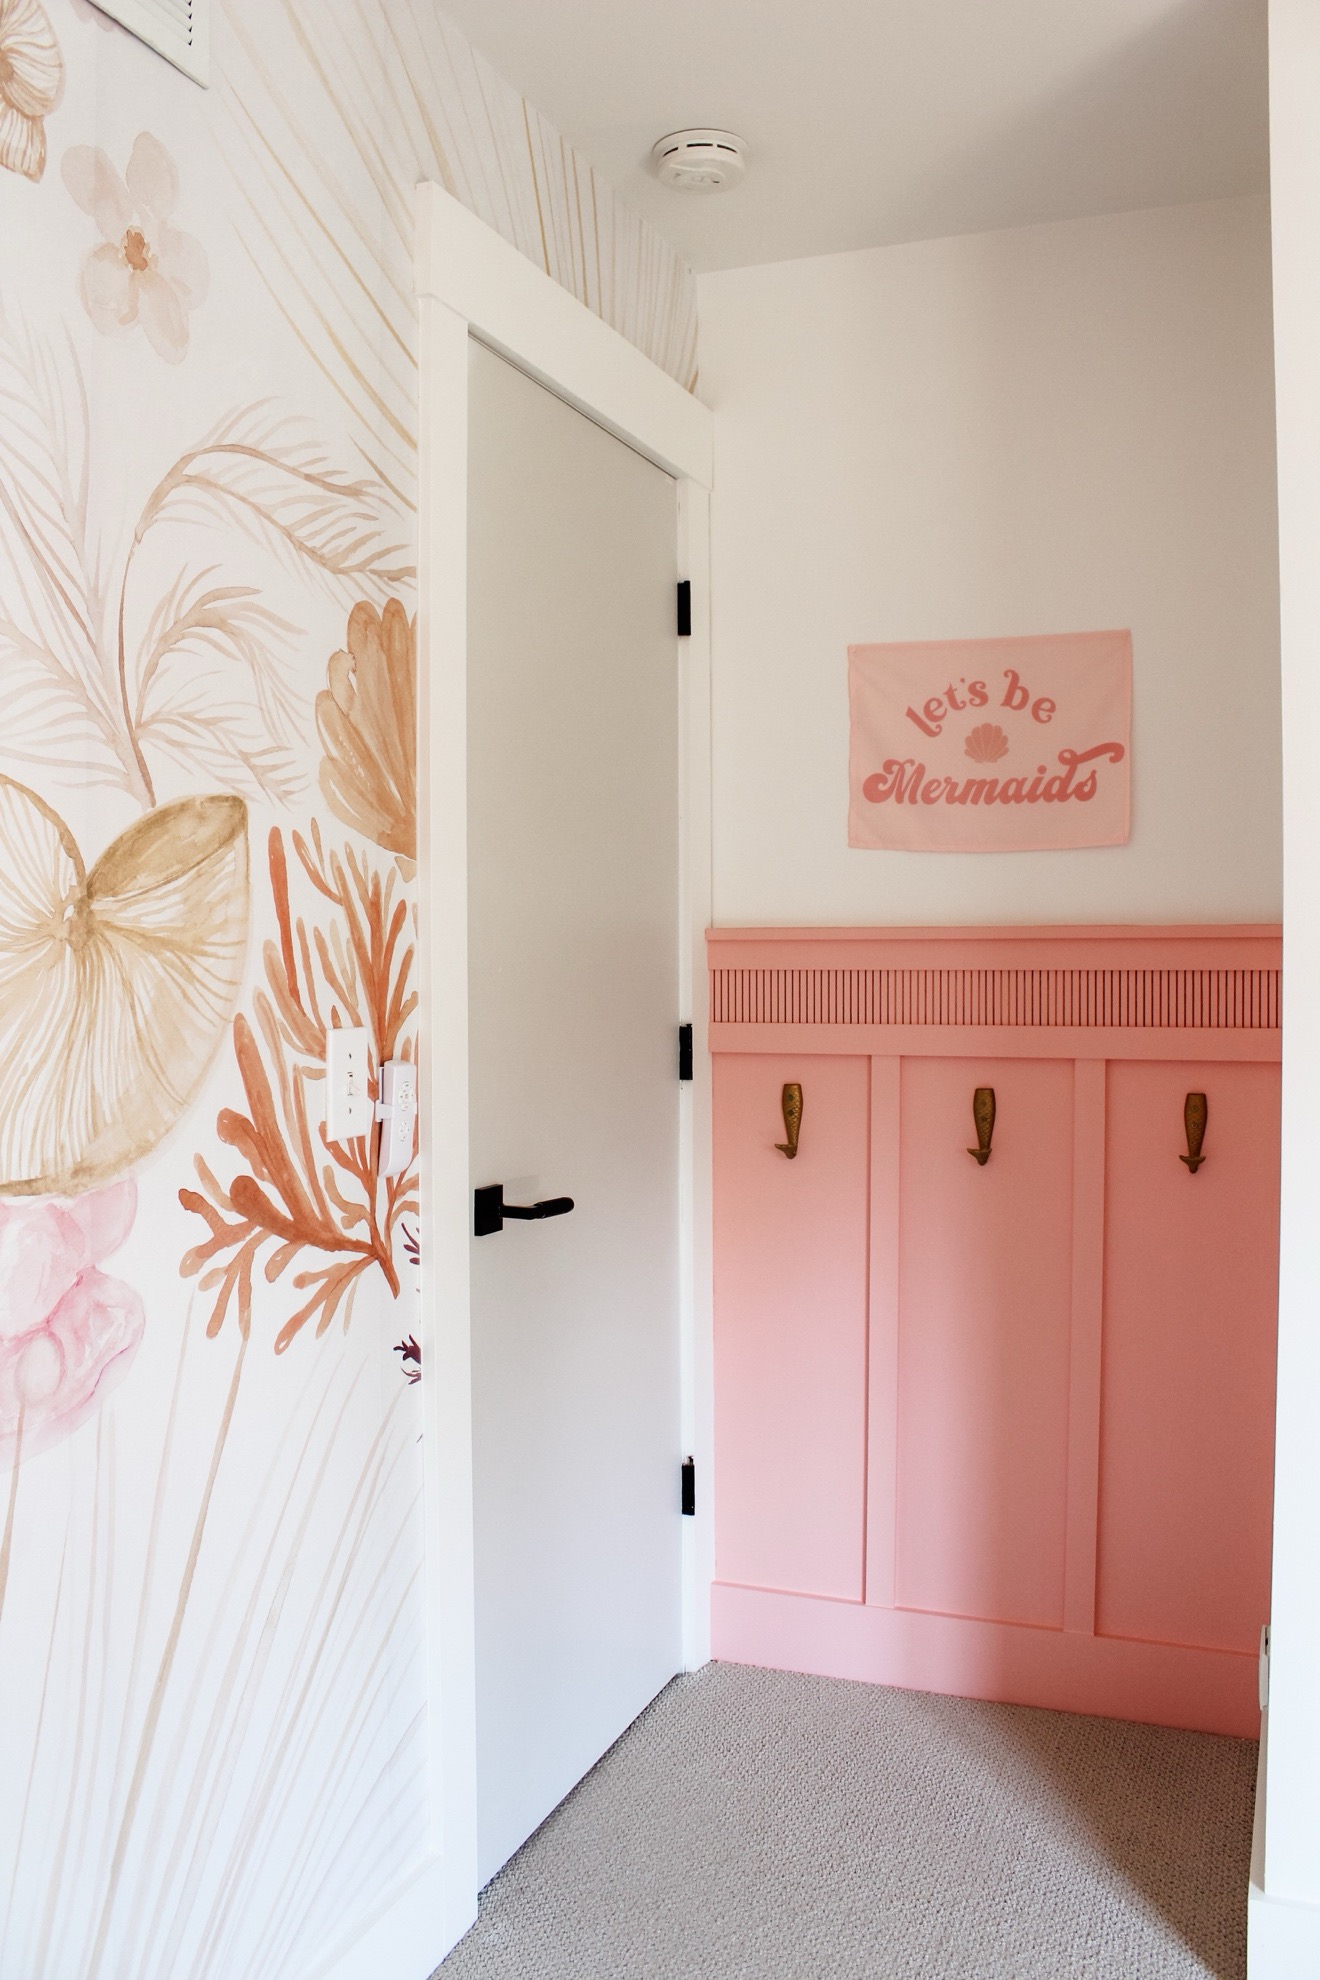
One other area we added a pop of color to was a board and batten wall we installed using all leftover material. This little board and batten area turned out too cute and it created a perfect place for her to drop her coat and bookbag after school.
Up next! Install lighting, furniture, closet, and organization.
Lighting.
When we first made Reese’s room into a nursery, I removed her fan and swapped it out for a chandelier. I have been regretting that ever since. Her room can get pretty warm, so I wanted to reinstall a fan. However, I don’t love the look of a traditional ceiling fan, so I decided to go with a ‘fandelier’ that went perfectly with the theme of her room.
Furniture.
We decided to reuse most of the furniture from Reese’s nursery except for a makeup table and a day bed we built ourselves. I fell in love with a daybed from CB2 but after seeing the price after shipping and buying bedding and a mattress we decided to build our own. Here is a quick video showing the process as well as a blog post giving some more in-depth details.
If building a day bed isn’t your thing though, no worries! Here is a list of some great options.


Other furniture pieces used in Reese’s room:
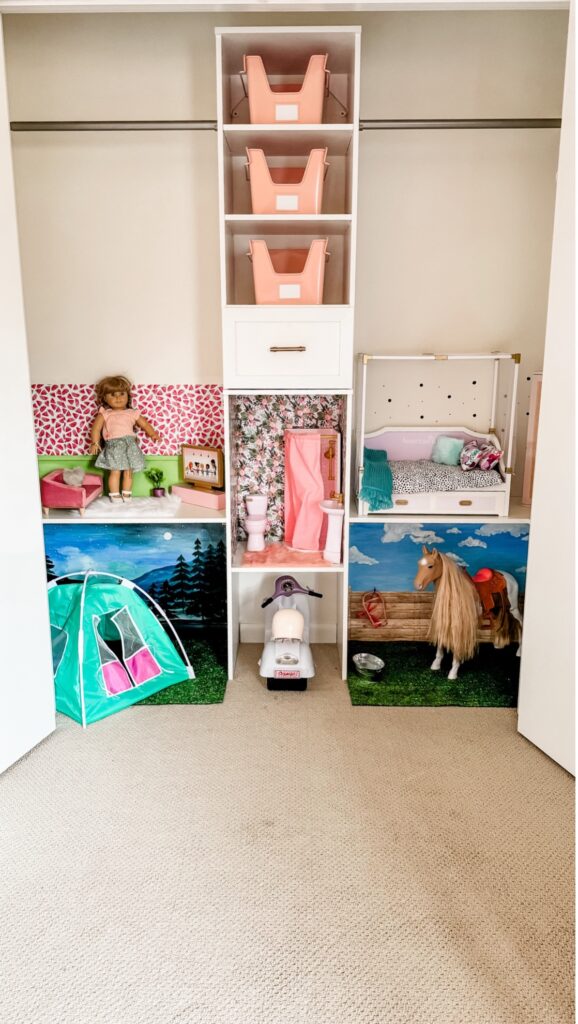
Closet and Organization.
Before starting this project, I decluttered Reese’s room and removed any old baby items she no longer needed. I also gave her closet a much-needed purge by getting rid of any clothes that no longer fit her. By doing so I was able to transform her closet from something cluttered and unorganized to not only organized but also an additional play area for her.
Yes! You read that right! I added a built-in doll house for her American Girl dolls to her closet so she would have an area to play.
List of the materials used.
Finally, adding that little details in Reese’s “big girl” mermaid bedroom.
It’s amazing what the little details can do. Such as doorknobs, hardware, hooks, picture frames, lights, baskets, curtains, pillows, bedding, and knickknacks. Below is a list of all the little décor pieces I used to tie this whole room together.
- Curtains
- Curtain Rings
- Curtain Rods
- Linen Textured Cotton Curtain (in blackout, pinch pleat, and coral)
- Night light
- Bedding (in London Luxe Bedding)
- Pillows
- Décor
Hopefully, this blog post has given you a little inspo to create your child’s big-kid room. We had so much fun throughout this whole process but nothing was as rewarding as Reese’s face seeing the room for the first time after everything was complete.


